Guide
How to assemble a resin storage shed
Resin sheds go together in roughly the same order regardless of brand: prep a level pad, build the floor if one is not molded in, snap or bolt the wall panels to each other and to the floor, then set the roof panels last. Two people make panel and roof steps far easier and safer than one.
Step by step
- Prep a level, dry base first. Resin panels rely on the floor being flat and square to lock together correctly. Finish your gravel pad or slab and check it for level before opening the shed box.
- Sort and inventory hardware before starting. Lay out every bag of fasteners and every panel against the parts list first. Resin kits have many similar-looking small parts, and discovering a missing bag mid-assembly is the most common complaint in owner reviews.
- Assemble the floor panel or frame. Some resin sheds ship with a one-piece molded floor; others use a separate floor frame kit. Set and level this piece first, since every wall panel keys into it.
- Stand and connect the corner panels first. Corners give the whole shell its square shape and hold the rest of the panels in alignment. Get all four corners plumb and loosely fastened before adding the panels between them.
- Fill in the remaining wall panels. Working from a corner outward keeps panel seams tight. Most resin systems use a tongue-and-groove or tab lock between panels, snug them together by hand before driving any fasteners.
- Set the roof panels with a second person. Roof panels are wide, awkward, and catch wind even in light breeze. Two people should lift and set roof pieces; doing this solo is where most reported drops and scratched panels happen.
- Install the door, hinges and any window trim last. Doors and trim pieces are the last fit-and-finish items. Check that the door swings freely and latches before final tightening of the surrounding frame screws.
- Anchor the finished shed. A resin shell is light enough to shift in wind before it is anchored. Follow the anchoring guide the same day you finish assembly, not weeks later.
How long does resin shed assembly take?
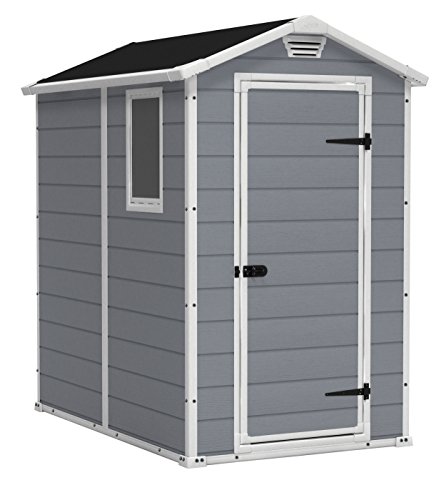
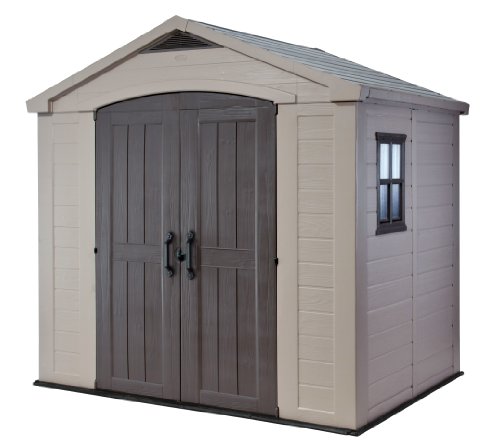
Smaller resin sheds like the Keter Manor 4x6 (around $429.99) are commonly finished in an afternoon by two people. Larger models like the Keter Factor 8x6 (around $975.79) have more panels and hardware and typically take a full day. Neither figure includes the foundation, which should be finished and cured or compacted beforehand.
Tools you will need
| Tool | Used for |
|---|---|
| Cordless drill/driver | Panel and hardware fasteners |
| Rubber mallet | Seating tongue-and-groove panel joints without cracking resin |
| Level | Checking the floor and each wall as it goes up |
| Step ladder | Roof panel installation |
| Work gloves | Handling panel edges and hardware |
Why the floor step cannot be rushed
Every wall panel in a resin shed locates off the floor's edge or frame. A floor that is out of square by even half an inch telegraphs into every panel seam above it, and by the time you reach the roof the accumulated error can keep panels from locking flush. Take the extra ten minutes to check the floor square (measuring both diagonals equal) before setting a single wall panel.
Common resin assembly problems and fixes
- Panels will not snap together: almost always a floor or corner that is slightly out of square rather than a defective panel; recheck level and square before forcing a joint.
- Cracked panel corners: usually from a rubber mallet used too hard, or assembly in cold weather when resin is more brittle. Assemble in moderate temperatures where the product allows it.
- Door does not latch: often the surrounding frame was over-tightened before the door was test-fit. Leave door-adjacent screws slightly loose until the door swings and latches correctly.
Safety notes
- Two people for every roof panel; a solo lift in even light wind is how panels get dropped or scratched.
- Never assemble panels or the roof in windy conditions. Wide, light resin panels act like sails.
- Wear gloves when handling panel edges, some resin trims have sharp mold lines.
What to have on hand before you start


Prices change often; the button shows today's price on Amazon.
What to do once the shell is up
Finish with anchoring (see the anchor guide), then check the door and roof seams for gaps before the first rain using the keeping a shed dry guide. Add shelving once you have confirmed the walls are square and fully seated; installing shelf brackets into a panel that later needs adjustment risks stripping the mounting holes.
How we approached this guide
This walkthrough is built from published manufacturer assembly instructions and recurring themes across verified owner reviews, not a hands-on assembly. Steps and part names vary by brand and model, so always follow your specific kit's included instructions over general guidance like this when the two differ.
Anchoring hardware to have ready before you finish
Resin panels are light enough that a partially assembled shell can shift in a moderate breeze before it is anchored, which is why lining up anchor hardware before the last panel goes on saves a second trip mid-project. A ground anchor kit with ratchet straps, such as TECH2EACH's kit (around $49.95), covers a small to mid-size resin shed's corner and wall anchor points in one purchase once the shell is up.
Sizing up: what changes on a larger resin shed
A compact model like the Keter Manor 4x6 has fewer panels, a simpler roof, and is realistically manageable for two people in a few hours. Moving up to something in the Keter Factor 8x6 class adds more wall panels, a larger roof assembly that genuinely benefits from two sets of hands rather than one, and typically more shelving or accessory options to plan for once the shell is finished. Larger resin sheds in the 8x10 range and up follow the same panel-and-roof sequence, just with more of each step, so the order of operations does not change, only the time and the number of hands needed at the roof stage.
Frequently asked questions
How many people do you need to assemble a resin shed?
Plan on two people, especially for roof panels and larger models. A single person can manage smaller kits like a 4x6 slowly, but roof panels catch wind and are wide enough that a solo lift risks a dropped or scratched panel. Two people also speeds up wall panel alignment significantly.
Do resin sheds come with a floor?
It depends on the model. Some ship with a one-piece molded floor included in the box; others are designed to sit on a separate floor frame kit or directly on a prepared gravel or paver base. Check your specific model's specifications before assuming a floor is included.
Can I assemble a resin shed alone?
Smaller models can be assembled solo, though slower, but roof panels are the exception: their size and wind resistance make a solo lift risky for both the panel and the installer. Recruit a second person at minimum for the roof step even if you handle the walls alone.
Why won't my resin shed panels snap together?
This is almost always caused by the floor or a corner being slightly out of square rather than a defective panel. Recheck that your floor is square (equal diagonal measurements) and that each panel is fully seated before forcing a joint, which can crack the resin.
What temperature is too cold to assemble a resin shed?
Manufacturers generally recommend assembling resin sheds in moderate temperatures, since resin becomes more brittle and prone to cracking at panel joints in cold weather. Check your specific kit's instructions for a minimum temperature, and avoid forcing joints with a mallet in cold conditions.
This page is researched guidance, not professional engineering, legal or building-code advice. Sizes, loads and permit rules vary by product and by town: check your local code and the kit manufacturer's instructions before you build.